Metal Detecting for Gold Nuggets (Part 2)

In Metal Detecting for Gold Nuggets (Part 1), we discussed some of the challenges associated with finding gold nuggets, and we went over a few of the better known brands of metal detectors that have a good reputation for sniffing out gold. In this article, we will continue our discussion of how to find gold nuggets with a metal detector by talking about where to specifically look to find nuggets, and how to deal with some of the challenges that you will face when you are starting out.
The very first thing you should do when you get a new metal detector is read the owner’s manual. After you have read it, start at the beginning and read it again. The key to successfully finding gold with a metal detector is to understanding your machine, so take the time to really learn it; how it works, the different adjustments, how to ground balance it, etc. One thing all successful nugget shooters have in common is an intimate knowledge and understanding of their machine.
If there is one “secret” to finding gold, this is it; search where gold has been found before. In the case of metal detecting for gold, you need to search where nuggets have been found in the past. Some areas have produced plenty of gold, but not in sizes large enough to be found with a metal detector. Many of the gold bearing states in the eastern US would be a good example of this. Some areas have produced gold, but only dust and small flakes. If you want to find gold with a metal detector, you need to seek out areas that have a history of producing nuggets.
Don’t just metal detect randomly. A common mistake is to assume that just because gold was found in a general area, that you can go anywhere in that area, turn on your metal detector and start digging up nuggets. Find the exact areas that the old timers worked. Look for old placer tailing piles, places where miners hand stacked rocks along a creek. Find those prospects in the side of the hill where someone did some digging. Look for large areas dug up with bucket line dredges or big hydraulic pits. If you are in an arid region, look for drywasher piles left behind by the old timers. Anything that shows sign that gold has been found in the area before is a good indication that it can be found today. The early prospectors were great at finding gold, but they didn’t have metal detectors, so you have the chance of finding gold that they missed.
Once you have found a good looking area, it’s time to start metal detecting. The first thing you need to do is ground balance your metal detector
This is where learning the “language” of your metal detector will really pay off. The fact is that even guys that are really good at finding gold nuggets with a metal detector still dig a lot of trash. It is just a part of the sport, and it is something that you just have to deal with to some extent. However, learning your machine will really help cut down on the amount of digging you have to do. Quality discrimination should be able to separate out much of the nonferrous targets that you go over with your detector, either by producing a different tone than gold makes, or by blanking them out completely. Each metal detector handles it differently, so learning your machine and how different types of trash sound compared to gold are extremely important if you want to be successful.
It’s always a good idea to bring a small test nugget out into the field with you. Take a small nugget and glue it to a poker chip or guitar pick, something that is not made of metal and large enough that you won’t lose it. This will help you tune your ear to the sound of gold and what you should be listening for.
Another bit of encouragement... if you are digging small pieces of lead, you are on the right track. It is almost impossible to distinguish the difference between lead and gold. While this can definitely be frustrating if you get into an area that has bullets and bird shot everywhere, you should also think of it as a good thing. If you are able to detect a small piece of bird shot, you will be able to find a small piece of gold. Often it just takes time, and maybe hundreds of pieces of trash before you are lucky enough to find that first piece of gold, but if you are persistent you will be rewarded.
Metal detecting for gold nuggets is probably the toughest type of metal detecting, certainly much different than digging up coins at the park. Nuggets are generally small, the ground is highly mineralized, and often there is metal rubbish scattered everywhere. Still, when you find that first gold nugget there is a good chance that you will be hooked for life. Good Luck!
Read: More Gold Articles
Get this Highly Recommended New Book:

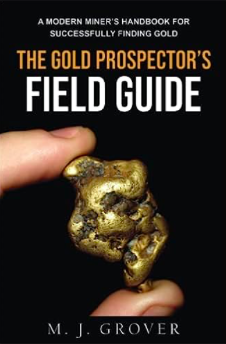
The Gold Prospector's Field Guide:
A Modern Miner's Handbook for Successfully Finding Gold

