Basics of Gold Panning

A Simple 7-Step Guide to Finding Gold with a Pan
Find an area along a stream or river that has good potential for having placer gold. The best areas to start looking are places that have a known history of gold production in the past. Use a shovel to dig deep into the gravels, continue digging until you reach bedrock, as this is where most placer gold will accumulate. Shovel a moderate quantity of gravels into your gold pan. Don’t load your pan with so much material that it is hard to work with, rather a medium amount of gravel that will be easy to process.
Remove some of the larger rocks from your pan, or consider using a classifier
Submerge the gold pan in water and agitate the gravel using a circular or side to side motion. At first, try not to let any gravel fall out of the pan. Use your hands to break up any clumps of gravel or organic matter than might be holding gold. Continue shaking the gold pan, which will allow the gold to work its way to the bottom of the pan.
Once the gravels have been thoroughly agitated, you want to begin to remove some of the material from the gold pan. Keep moving the pan in a circular motion, and slightly tip the farthest edge of the pan away from your body. Ensure that there is always plenty of water in the pan to keep the contents suspended, allowing the gold to remain safely at the bottom. Some of the lighter sands and gravel will pour out of the pan. Every so often, level the pan out and agitate the mixture to ensure that all the fine gold remains safely in the pan. Repeat this process, and eventually you will reduce the contents of your pan to just the heaviest materials.
One you have gotten down to just the heaviest contents, the separation process will get a little bit tougher. Take it slow and continue reducing the material until you are down to a very small amount of material. At this point you should be down to mainly black sands and hopefully a little bit of gold! With plenty of water in your pan, slightly shake it and try to get the black sands to separate from the gold. This can be easier said than done, but keep practicing and your skills will improve.

Read More >>
If you are fortunate to have any sizable flakes or small gold nugget in your pan, use your fingers or tweezers to carefully remove them. Place them safely in a small vial for safe keeping. Use a snuffer bottle to carefully separate the black sands from the fine gold left in the pan. Then suck up the gold into the snuffer bottle. This can take quite a bit of practice to master, but be patient with it and you will improve your skills.
Keep in mind that not every pan is going to have gold; sometimes you have to do a bit of searching to find it. Keep on prospecting, look in all the likely areas, and sooner or later you will start finding some “color”. Once you have found an area that is producing a good quantity of placer gold by panning, you may want to start using a sluice box or suction dredge to start increasing your production.
More Articles about Gold Panning:
The Gold Prospector's Guide eBook
Gold Prospecting Clubs: State Directory
Gold Prospecting Equipment
Buy a Gold Nugget
Highly Recommended Prospecting Books on Amazon:

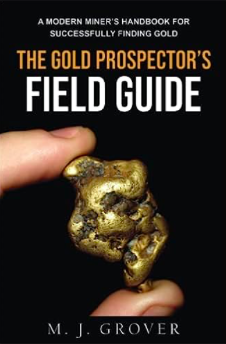
The Gold Prospector's Field Guide:
A Modern Miner's Handbook for Successfully Finding Gold

Metal Detecting Gold Nuggets:
The Essential Guide to Finding Gold with a Metal Detector
